Home › Forums › 11′ 10″ ARRIBA / OONAGH Dinghy – Official Step-by-Step Boatbuilders’ Forum › ARRIBA / OONAGH – 14 – Bulkheads & Compartment › Mast Plug, Epoxy and Inwale Spacer Blocks
- This topic has 3 replies, 2 voices, and was last updated 5 years, 1 month ago by
 Doug Hermann.
-
AuthorPosts
-
-
May 9, 2021 at 8:56 pm #43720Doug HermannParticipant
I spent the day applying epoxy to all the bits and pieces that form the support structures for the bow, center and stern thwarts. Once these set up, it will be time to thicken up some more epoxy and permanently piece it all together.
I also used the thickened epoxy in a caulking tube as the material to fasten 48 spacer blocks to the gunwale. I am now thinking I might the inwales bright. They look so good with epoxy, shame to cover them up with paint. It was a day of fiddlely things, lots of epoxy.
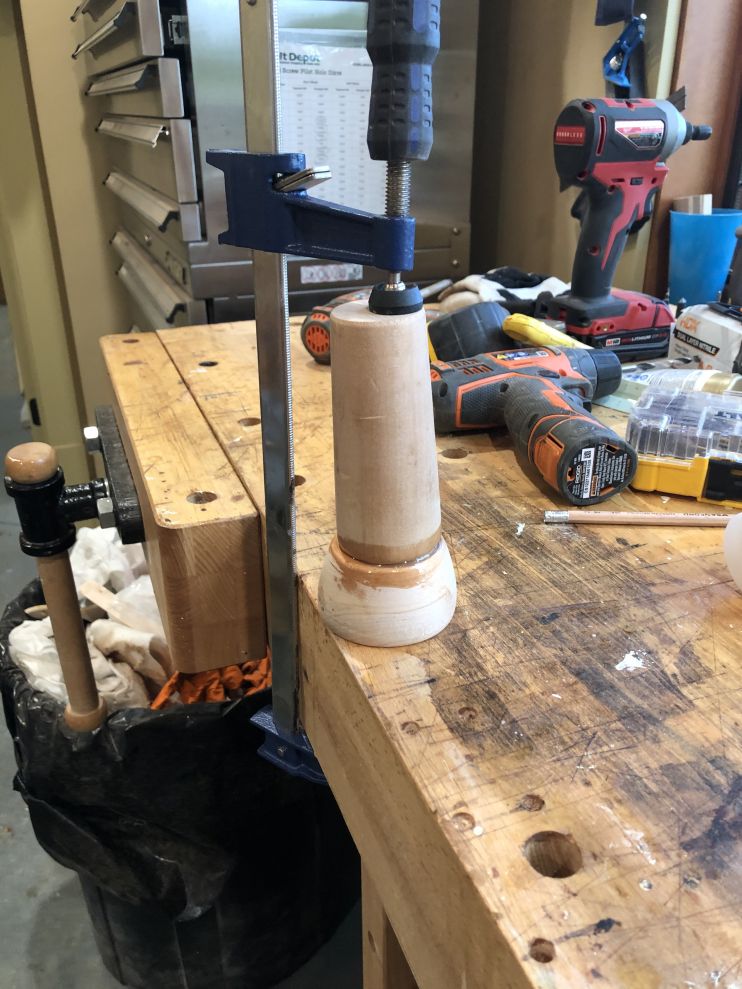
This is my best effort to create a lathe to turn a block of wood into a plug for the mast partner. It worked reasonably well .

This is what I came up with for the mast step plug. Hand turned block, brass rod, wooden plug for thru hull fittings that was laying around and some epoxy. A little paint and it will be a gem!
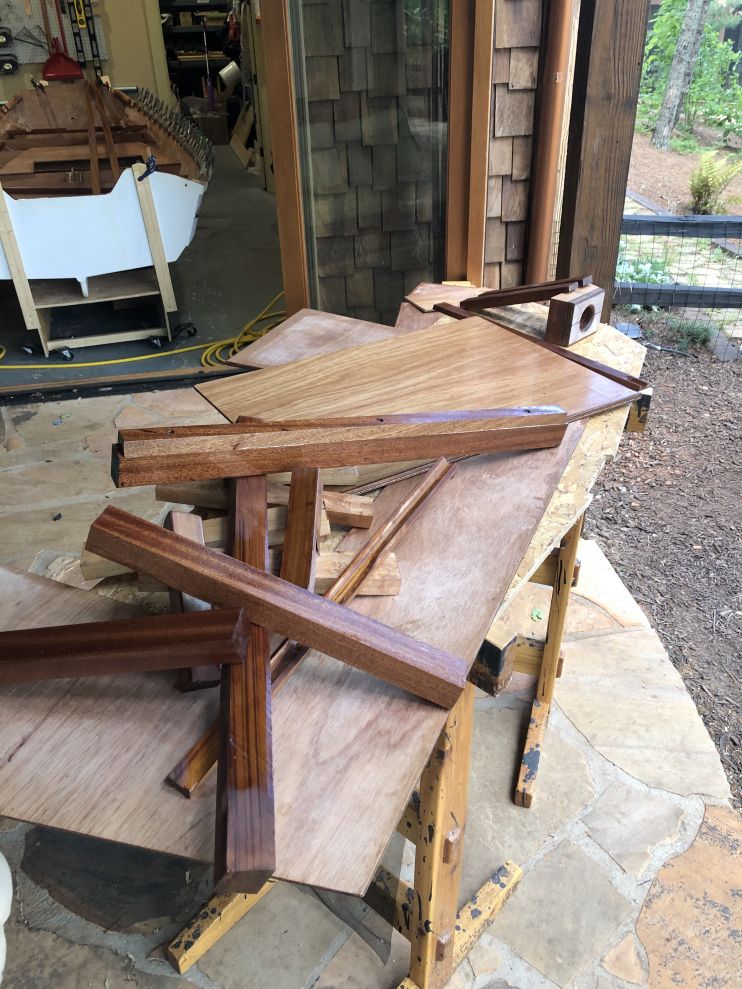
Piece parts getting their epoxy coats.
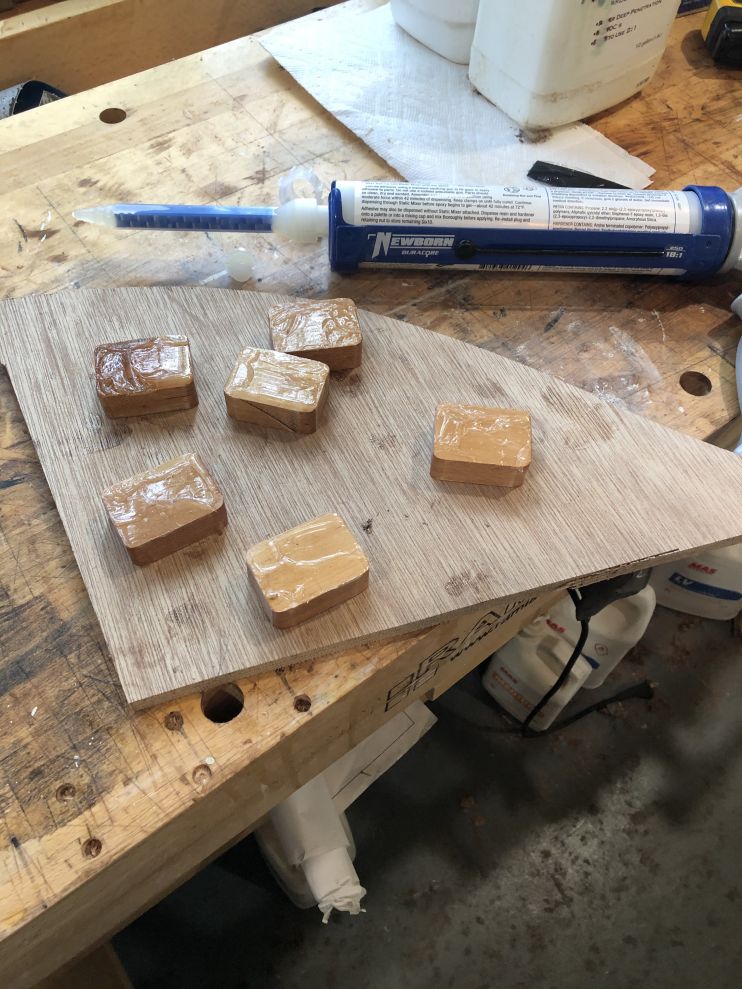
The thickened epoxy on the spacer blocks. I had coated them with epoxy a few weeks back.
More piece parts all epoxied. You can see the two lengths of inwale…. Paint or varnish???
48 clamps holding the spacer blocks while epoxy sets up. The blocks at 2” long, and space between them at 3” worked great. Very symmetrical on each side and looking across side to side.
To get the exact layout I took,some addding machine roll paper and laid it out and then marked the spacing and then transferred those marks to the gunwale to guide the installation with epoxy.

-
June 20, 2021 at 4:14 pm #43940
michael Keefe
ParticipantDoug,
How critical was having that nice-looking bench in terms of accomplishing the build?
Mike
-
June 20, 2021 at 8:24 pm #43942Doug HermannParticipant
Hi Mike – the bench is just what I have. A gift from my boys years ago. Look carefully and you will see I don’t baby it. All,kinds of extraneous drill holes, globs of paint, epoxy, etc. when I am done with this build, I will scrape it down, fill I. All the blemished, sand it smooth and finish off with a couple coats of varnish. Should be good for another 25 years!
as you watch Eric Blake’s videos, you will see how Brooklin Boat Yard, a builder of numerous multi, multi, multi millions of dollars yachts…. Don’t spend their money on fancy workbenches. Slap together some 2x4s, some OSB ripped to about 12-18 wide and build yourself a 50 foot long workbench. When I got to tour through Brooklin Boatyard, that really stuck out. Very long, very skinny work surfaces. No fancy bench vises and 500 pound Oak workbenches with 87 coats of clear coat. Yes they had a few assembly tables for doing vacuum bagging, but that was minimal. It seemed like every exterior wall, every railing protecting you from falling down a staircase all had a workbench. There was a video of Eric making a tiller. Fascinating craftsmanship on top of some dingy beat up OSB, not more than a foot wide, some sharp tools and an artist touch knowing how to use them all.
If I was to build a shop today, it would be long skinny workbenches.
-
June 20, 2021 at 10:26 pm #43948Doug HermannParticipant
Mike – my bench top got a little cleaner tonight. Perhaps clean enough to see it is certainly no museum piece. I drill on it, spill epoxy and other nasty chemical things, mark on it, draw plans and do calculations (never seem to find paper). You can see my layout marks for the gunnel guard I did earlier today . Dog biscuits are for the 2 dogs who,love to pester me while working!
Ifmimdidnt have it already, I nice narrow work surface from tool chest to corner out of sight to the right. Level with the windows. We are in the mountains and I do have a nice view

-
-
AuthorPosts
- You must be logged in to reply to this topic.