Home › Forums › 11′ 10″ ARRIBA / OONAGH Dinghy – Official Step-by-Step Boatbuilders’ Forum › ARRIBA/OONAGH – 12a – Epoxy Finishing Inside & Out › Preparing the Inner Hull
- This topic has 3 replies, 3 voices, and was last updated 5 years ago by
THOMAS HATCH.
-
AuthorPosts
-
-
April 12, 2021 at 8:47 am #43483
 Bob DonaldsonParticipant
From my Blog: https://house-doc.net/Oonagh/?p=702
3-29-21 – Now that the boat is right-side up I can begin working on the interior. However, before I start adding stuff, I need to do some cleanup on the interior while it is unobstructed with bulkheads. First on the list is leveling the boat, both longitudinally and side to side. This will be necessary when I begin adding vertical partitions.
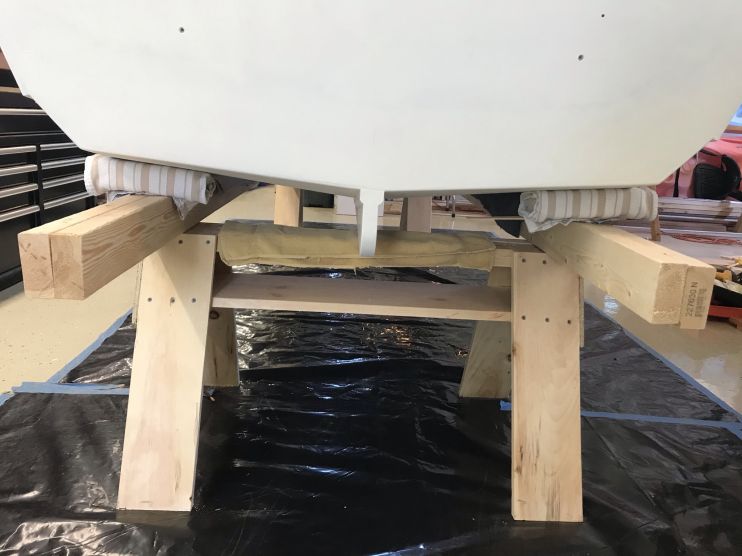
Apparently, the camera was not level, but the boat is.
I screwed double two-by-fours onto the sawhorses and made sure they were level. Then I took 4 short pieces of 2×4, wrapped them in towels to protect the bottom, and placed two in front and two in the rear. This allowed me to level the boat side to side with shims.

To level it front to back I took the measurements off the plans from the rear of the skeg and just forward of the centerboard slot. There was a 1″ difference from the baseline, so I measured the distance from the floor to the skeg and then raised the front until the keel was 1″ higher in front of the centerboard.

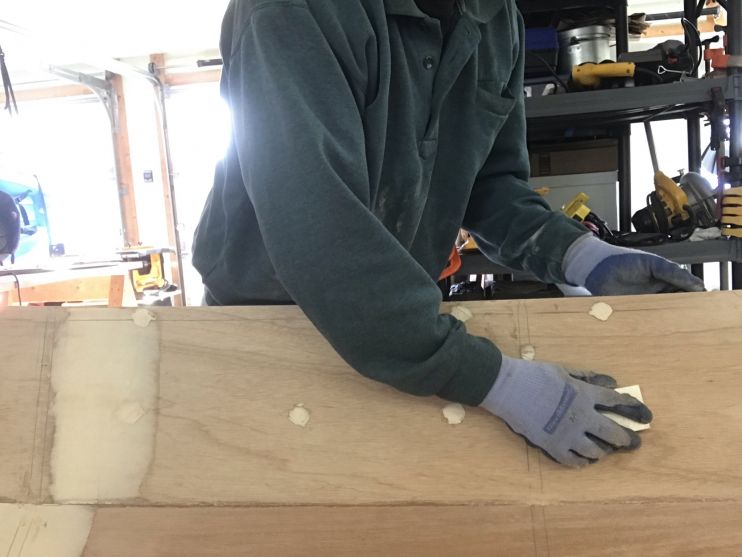
Next, since I used 3/4″ screws on the bottom planks, and most of them poked through the inside of the inner keel just a little bit, that needs to be fixed. Surprisingly, I was able to use 80 grit sandpaper to sand them flush since silicon bronze is a fairly soft metal.
Before sanding.
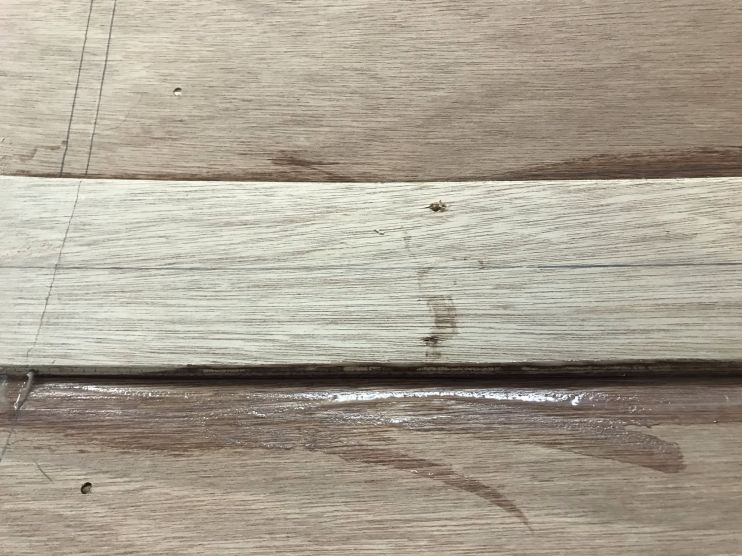
After sanding.

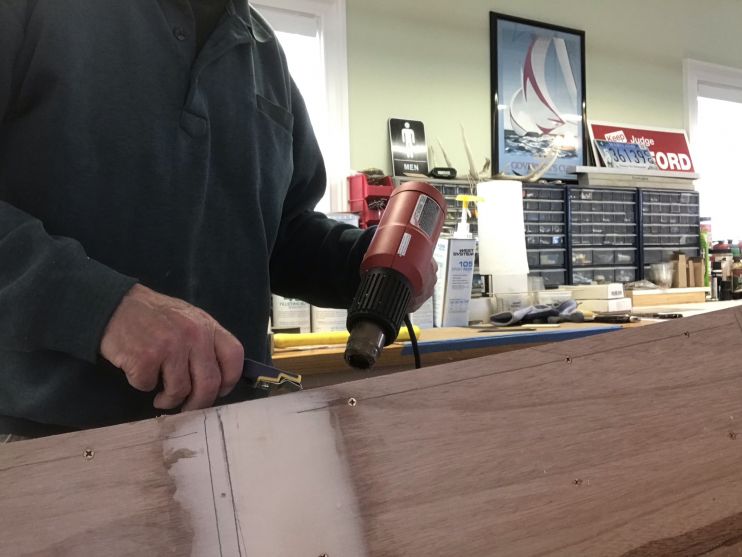
The next project is to clean up the epoxy that squeezed out when it was on the mold. This is accomplished with a heat gun and a scraper.

Next, I mixed some epoxy thickened with 410 microlight fairing filler to a peanut butter consistency and filled all the screw holes and any other blemishes on the interior.
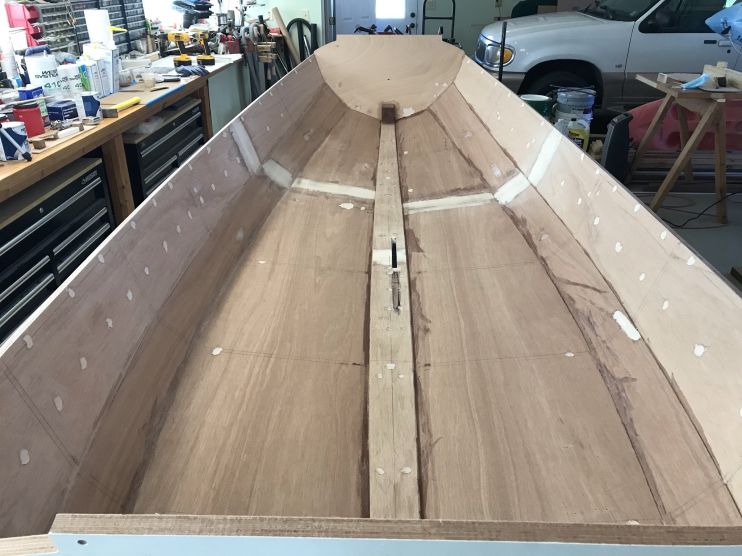
Tomorrow I will sand all the joints and fairing filler and then give the entire interior a coat of unthickened epoxy, using the 207 clear hardener. That will help preserve the wood in the event any water gets past the paint layer.
3/31/21 – Taking a couple of days off to work on other things. Won’t be back till Friday.
4/2/21 – Back to work. Video #12 came out and recommends putting a few long screws through the skeg and into the keel. Since I have already flipped the boat over, I decided to put the screws into the skeg from the inside. The longest screws I have on hand are 1 3/4″. Since the Inner and outer keel equal 1 5/8″, I can only use them on the thinnest parts of the skeg. On the deepest parts of the keel I want to get at least 1″ bite into it. By countersinking the screws as far as possible, I decided I could use 3″ screws.

I contacted Rob Lehmann at Fair Wind Fasteners and asked if he could sell me 3 – 3″ screws and he said he could do that if I used a Fearson head instead of the square drive and I agreed. (Fearson Head screws are similar to Phillip’s head, but don’t strip out as easily.)
Next, I spent the remainder of the morning sanding all the places I filled with fairing filler a couple of days ago.
Then I gave the whole boat a wipe-down with alcohol.

I mixed up a batch of clear epoxy using 105 resin with the 207 hardener. The 207 hardener gives you more working time than the 205 hardener and spreads more easily. 6 pumps of each made up about 5 ounces of epoxy. I used a chip brush and a small foam roller.
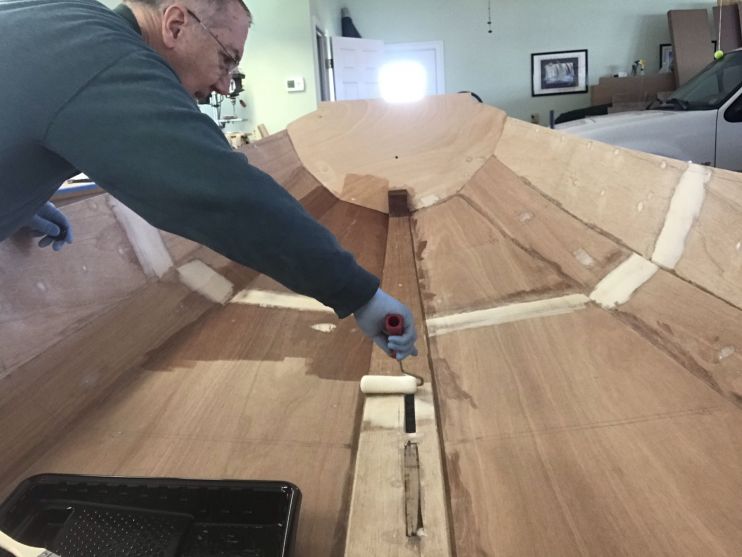
It took 6 batches of epoxy, for a total of 30 ounces to completely coat the inside.


3/3/21 – Sanded the interior epoxy. Looks like the next step before the knees and inwhales is the centerboard trunk and interior partitions.
I spent some time laying out the centerboard trunk location and the center seat partitions. Looks like I got the CB hole in the right place.

I then did a test fit of the center partitions.

The partitions don’t fit as tightly as I expected. I’m not sure how to get them to fit and hold them in place until the epoxy cures. I’ll have to do some thinking about that.
4/4/21 – This morning I had a eureka moment. I put station #6 from the mold back in, on the lines I drew before taking it out and clamped it to the upper guard. This forced the boat back into the shape necessary for the center partition to fit properly.
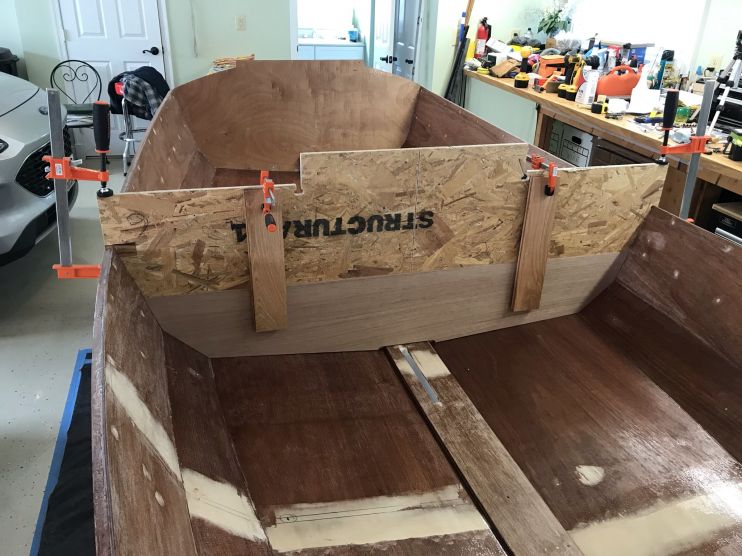
Today is Easter, so I’m taking the rest of the day off. Tomorrow, I will remove the mold, cover the bottom edge with packing tape and re-install it. Then I should be able to install the partition using the mold to keep it straight while the epoxy cures.
4/5/21 – Sanded the entire interior again with 60 grit paper on my sheet sander. Much more effective than my sanding block. Temperatures in the 70’s and yard work calling.
Oonagh’s new home will be davits on my pier.
4/6/21 – Starting on daggerboard trunk and seat partitions. See next post.
-
April 20, 2021 at 9:38 am #43557
 Steve StoneKeymaster
Excellent Bob. Since your boat will be stored outside, right side up on davits during the season, you might think about either a drain hole & plug at the lowest spot in the hull, or a cover. Both have pros and cons. The drain hole/plug is easiest (especially not have to deal with the cover every time you go out, and come back in, but the cover will save on sun/weathering. A drain hole/plus, plus an easy/simple wrap-around sunbrella sail cover might be a good combo. On our CY, I simply take the long zippered sail cover/bag and drape it over the rig and tie it on using the sail ties. That allows quick/easy stowage and getting under way, protects the sail from the sun and rain, but also lets it breathe. That solution along with a drain plug would allow you to quickly stow the boat, lift it up on the davits, and walk away without worrying about a big rainstorm. You’re probably way ahead on that thought but just putting it out there.
-
April 20, 2021 at 11:25 am #43558Bob DonaldsonParticipant
Good idea with the sail cover. I may eventually do both. For this summer I plan to just go with the drain plug and sail cover, but longer-term, when it is not sailing weather, I need to figure out whether it’s going to be outside, where it will need a cover, or if I can store it in my garage where I built it. It takes a fair amount of space.
-
June 19, 2021 at 9:02 am #43931
THOMAS HATCH
ParticipantJust read this post in detail; it was very helpful to me. I’m just at this stage, flipped the boat yesterday and will start on the interior tomorrow. Thanks for doing this.
-
-
AuthorPosts
- You must be logged in to reply to this topic.