Forum Replies Created
-
AuthorPosts
-
November 22, 2024 at 12:04 am in reply to: Building with Plans Only? – Let’s talk boats on Whidbey Island #51627
Tim Economu
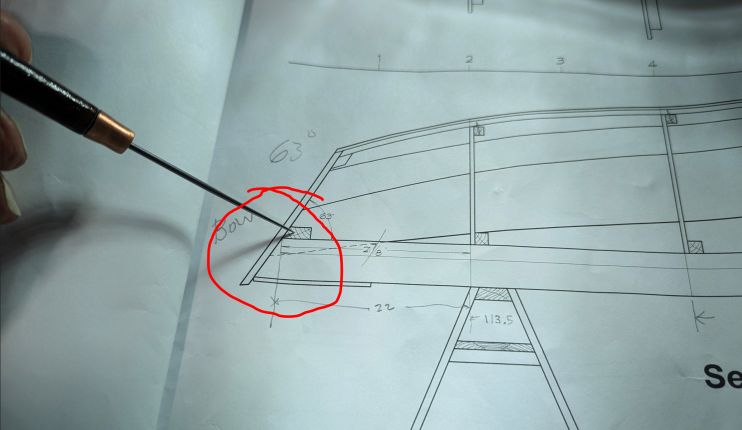
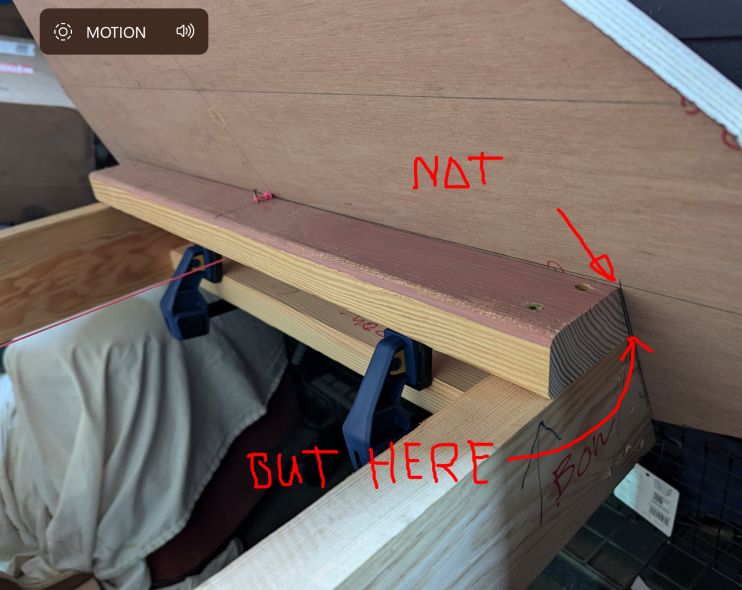
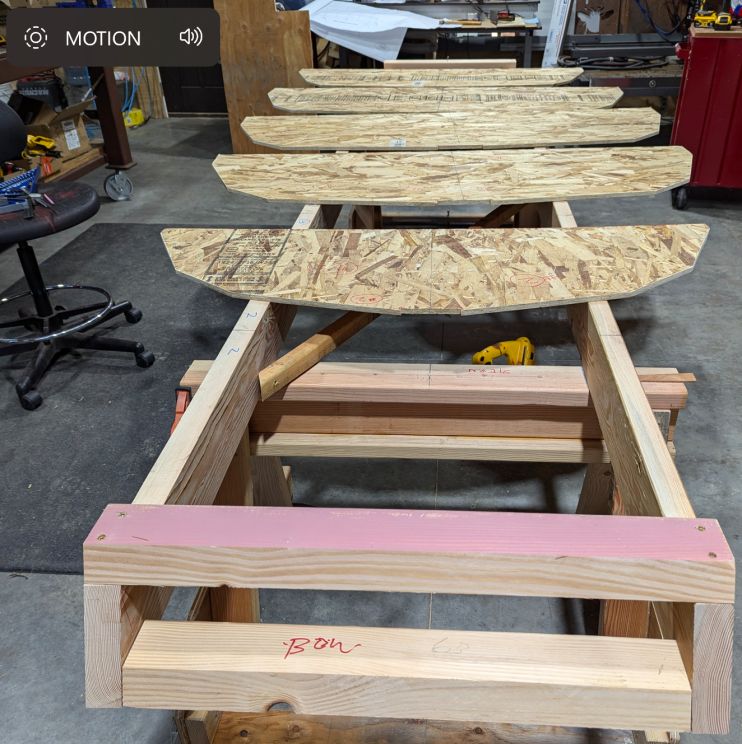
ParticipantOh boy that bow transom has me worried. I’ve put the line that aligns to the top of ladder frame, on the top of the ladder frame (not the top of the 2×4 rung) so it sits really low on the frame. Could it be that you used larger ladder frame members? I’ve used 2×6 that were squared up/shortened on the table saw, to about 5 inches high. If you used 2×8’s that might explain the differences in the transom height…

thanks for the pics Ted!
t
November 21, 2024 at 1:00 pm in reply to: Building with Plans Only? – Let’s talk boats on Whidbey Island #51625ParticipantAnything you have that shows the ladder frame would be excellent. I can’t find any pictures on the site or on the interwebs that show the ladder frame as built from plans.
The drawings show the transoms with a line that aligns with the top of ladder frame, but the ladder frame has rails and “rungs” and after some measuring around you see that the transom lines up with the top of rail, not the rungs. Just something one has to spend some time to sus out.
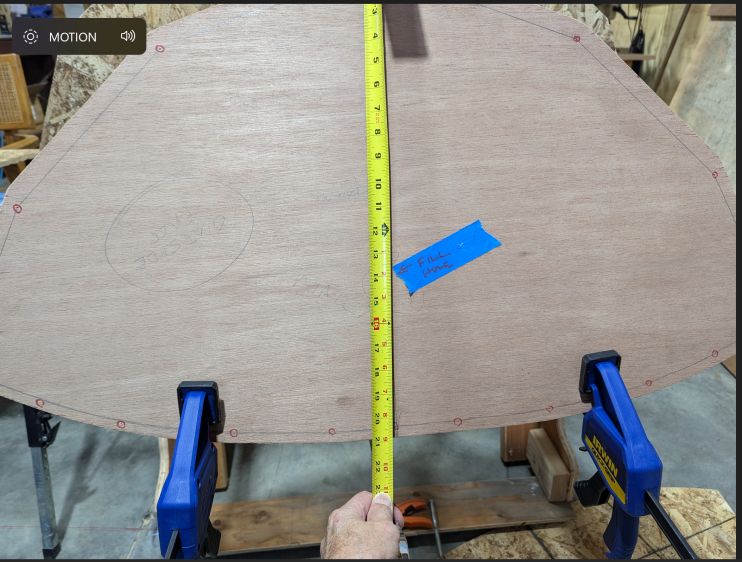
Also any picture showing you measuring any parts. The kit comes with precut parts, but the plans have you build from a scale denoted on the plans, which may or may not be accurate (the print, not the design). So a picture showing a part with a tape would be help to anyone coming along later building with the plans…especially for the molds or transoms, since the boat is literally built around those parts.
t
ParticipantI guess my question is more about the hinged doors. What are you doing with gasketing to keep the doors from leaking? Or are you not worrying about water splashing in from above?
For a flipped boat, you would want locks on the hinged doors, and good gaskets to keep the water out. That would give you more natural floatation, no?
t
November 20, 2024 at 11:53 pm in reply to: Building with Plans Only? – Let’s talk boats on Whidbey Island #51619ParticipantTed, did you build with plans, or the kit? I’d love to see some pics of early builds with the plans only…the ladder frame is different enough that many who come later might appreciate. If by kit, would you be willing to post the pictures?
About powering with the wind…I’ll consider it but here in the PNW we don’t get a lot of summer time wind. But we do get a lot of solar. Plus I can always go back and add all that sailing stuff later. I just don’t really like putting all those additional holes in the boat…for now.
Thanks again..
Tim
November 19, 2024 at 8:42 pm in reply to: Building with Plans Only? – Let’s talk boats on Whidbey Island #51589ParticipantHey Doug,
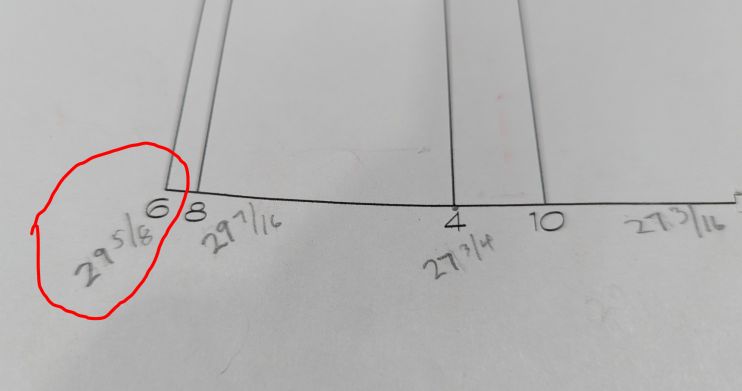
Thanks for the responses, really appreciate that. I have looked through all your build pages and photos and I must say you do nice work, you should be happy! About the print accuracy, I’m not questioning Doug Hyland, I’m questioning the scale coming from the printer. The print just says Full Scale, with no ruler to check the accuracy of the copy with. I’ve got 29-5/8″ for the largest mold, I’m just hoping the scale of the copy is actually 1:1 so that full scale is full scale! Other print pages are similar in have a scale noted. Adding a ruler at the bottom of each page would enable the builder to instantly check to see that 12″ = 12″ or whatever scale was set is the correct value. I have asked Offcenter to do that fix
As for scarfing the 6mm and 9mm plywood, yeah most of it I can break down to get smaller pieces to scarf, and do it on the floor also. I’ve got a nice flat floor, lined with wax paper or plastic should work ok. There is one scarf that will be a sheet and a half of 9mm that will be a 4ft scarf, so I will do that one last, as I get better at it.
First I’ve got some 5/8 CDX that I can practice with, and try scarfs using the electric planer method.
Thanks again!
Tim
-
This reply was modified 1 year, 8 months ago by
Tim Economu.
November 18, 2024 at 11:37 pm in reply to: Building with Plans Only? – Let’s talk boats on Whidbey Island #51569ParticipantLooks like there was a lot of activity back when the kit was released, and the video series was being released to the forum. But…Since there seems to be no one the forum anymore, I’m moving the build to this address: https://boatbuild6.wordpress.com.
Hope the forum comes back to life! It could be a really good resource for builders and future builders alike…
Sadly signing off…
Tim
-
This reply was modified 1 year, 8 months ago by
-
This reply was modified 1 year, 8 months ago by
-
This reply was modified 1 year, 8 months ago by
November 16, 2024 at 6:28 pm in reply to: Building with Plans Only? – Let’s talk boats on Whidbey Island #51553Participant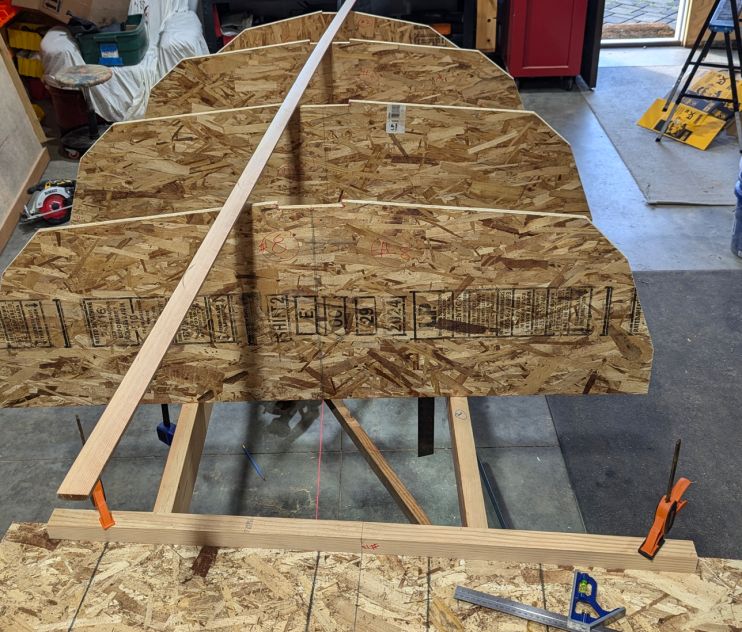 Participant
Wow what a pretty boat this will be. What if any changes are you going to do? That magic prop is going to be something! I do love how you commandeered the garage. Who needs to park cars?
I’m just starting the OONAGH from plans, quite a ways behind you, just finished the ladder frame. I hope to flip for New Year. We have similar backgrounds, especially if you are electrical engineer, with building other stuff…except this is my first boat…
Tim
-
This reply was modified 1 year, 8 months ago by
-
This reply was modified 1 year, 8 months ago by
November 15, 2024 at 8:03 pm in reply to: Building with Plans Only? – Let’s talk boats on Whidbey Island #51548Participant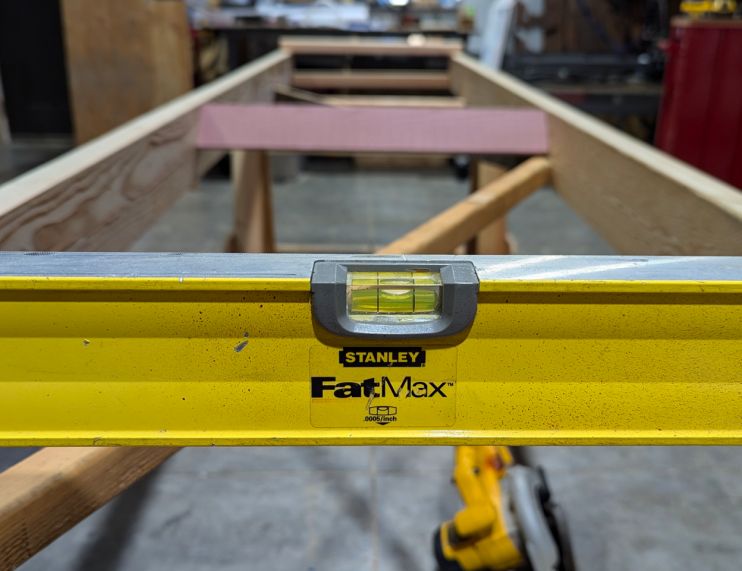
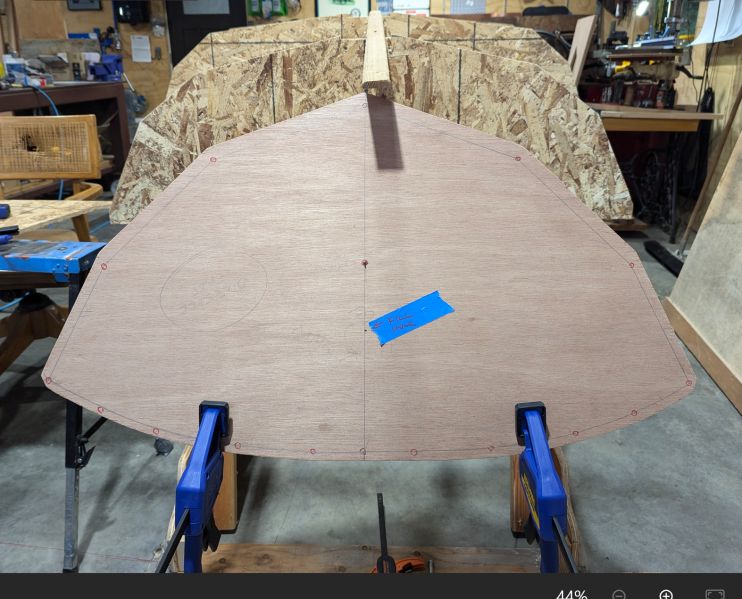
Got the ladder frame leveled on both ends and middle, then went to work on the molds. First adding the 2×2 cleats and the locating them at centerline for each station, with the cleats on the side shown on the plans.
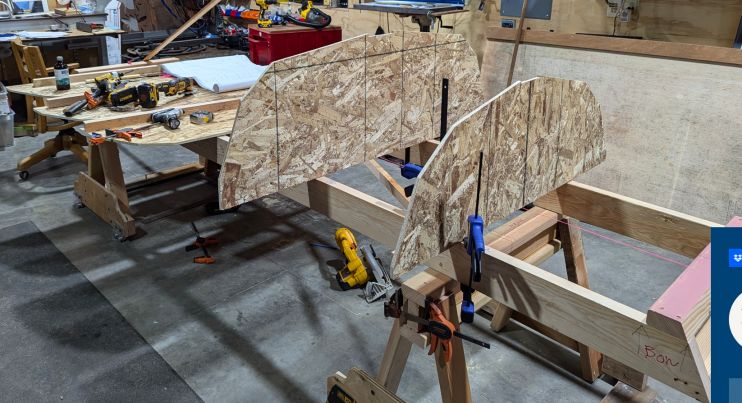
Until they were all installed with both the bottom and top cleats. The top cleat has a single screw hold for attaching the keelson.
PIC here
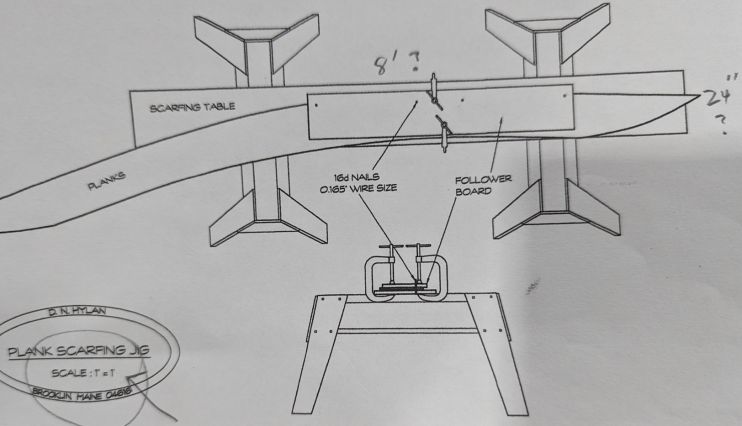
And there still is the scarfing jig question…if the dimension is really as shown or do I have an out of scale drawing?
But I can’t show the image because offcenterharbor.com is showing this message, even though the image is under 1M.
 November 15, 2024 at 12:01 am in reply to: Building with Plans Only? – Let’s talk boats on Whidbey Island #51440Participant
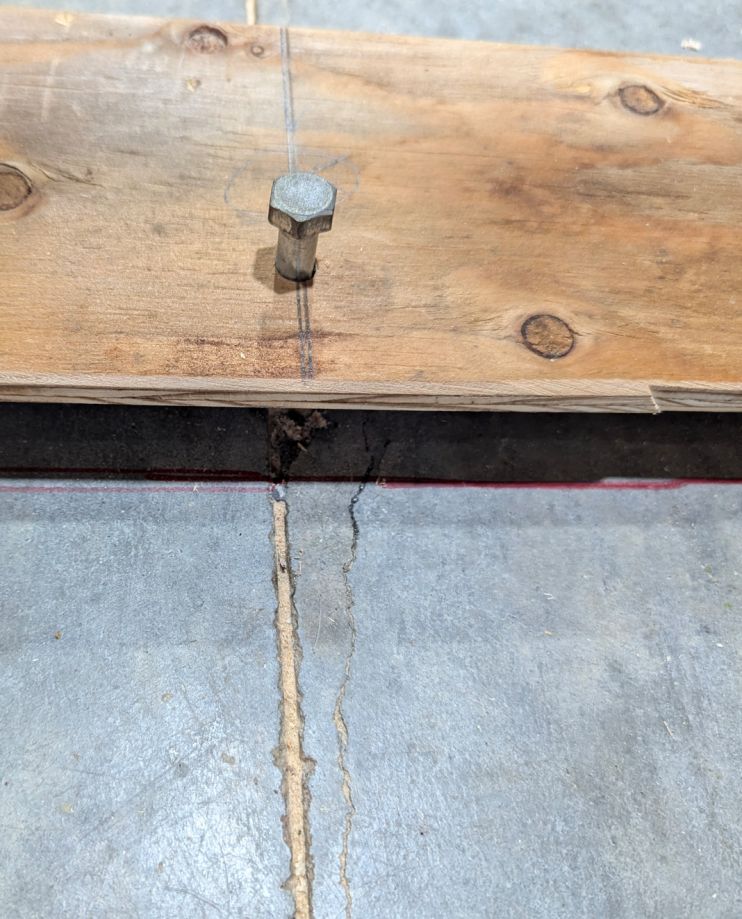
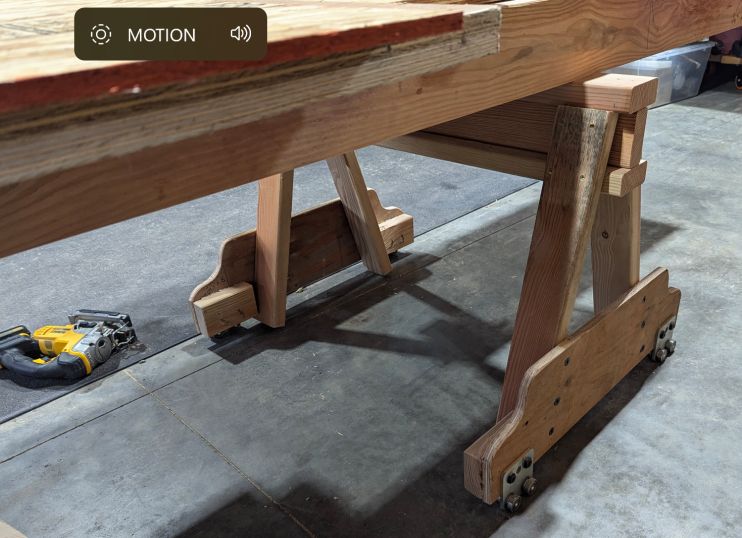
Got the ladder frame complete today, leveled from side to side. Put a string line on the centerline to align the molds. Attached a board to each sawhorse with a 3/8 in hole for using a 3/8 lag screw that lines up with a socket in the floor. Now I can roll the hull outside for sanding or whatever, and roll it back into the shop into the same position it was before. Not sure I needed that, but by dog I have it!
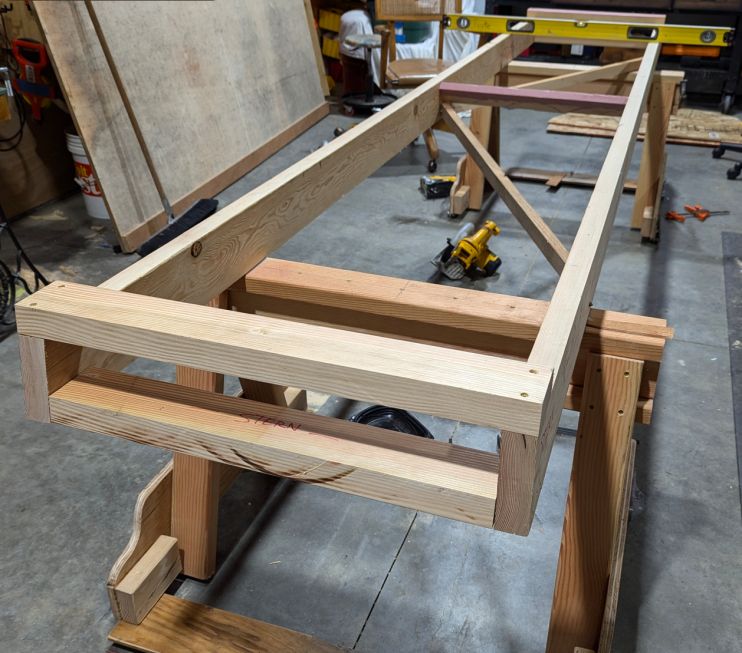
Next I laid out the molds to enable adding the bottom cleat……
 Participant
I’m planning on using the X5 series Golden Motor outboard.
Both the Golden and Epropulsion can use an owner battery pack.
EZoutboard eXtreme EZ-X05 (3 KW) 5 Horsepower
Tim
ParticipantHi Doug,
How does “the watertight bulkheads ” achieve waterproof-ness? Do you actually seal with epoxy?
Thanks,
Tim
November 13, 2024 at 11:53 pm in reply to: Building with Plans Only? – Let’s talk boats on Whidbey Island #51377ParticipantOK, I’m gonna do a list of questions that came up for me that may not be apparent with the plans and the extensive documentation that comes with said plans. Kit’s fantastic videos are the best, I’ve run them sooooo many times, and get something new every time I watch. One thing to be clear about is that she is building the kit…get it Kit is building the kit…haha. This means that you need to pay special attention to the plans page marked “Setup for Building from the Plans”, and the page of documents marked, “Construction Specifications for OONAGH”, you will see that the ladder frames are different. With the kit, you will use 2x material plus the OSB frame rails. With the plans only, you will use two 2×6’s squared and leveled for the frame rails, and the molds will rest on top of those rails.
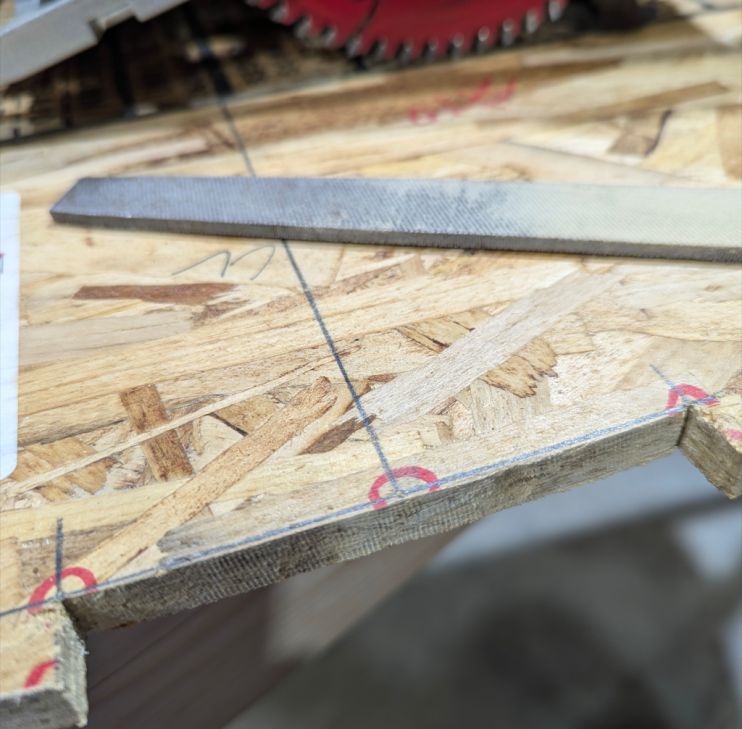
When you build the molds, you will use the “full size” mold outlines, using pins to mark the vertices of each panel. One thing you will note is that there is no ruler on the page, so you can’t verify that the outline drawing is the right size. I measured mold 6 (the widest mold) to be 29-5/8 (x2) wide, which I am hoping is close to the right size. The boat has a 60 inch beam, so I think that should be pretty close. If anyone would like to verify that number, it would be super cool.
I did get the last of the five molds cut today, using the print, so they will all be proportional, and close to spec! There is a bit of filing left to do on the cutout for the keelson, to get it right on the lines.
Moving on…looking at the scarfing table, my drawing shows it to be only 8 inches wide, as it’s on a small 8×10 sheet, and the scale on the drawing is 1″ =1′. But watching Kit, hers looks to be maybe 24 inches (plus or minus). Since the biggest plank is under 24 inches wide, it would be safe to go 24 or maybe 26 inches wide to allow a little extra material in the jig. Maybe Doug will see fit to add a ruler on the drawings so the scale can be verified, for those of us working on the plans only versions. Does anyone have a actual dimension they can share for the table? Many thanks if so.
I built some rolling sawhorses to be able to move the hull outside for sanding, out through the garage door. I used unistrut trolley wheels, they roll nice on concrete or pavers, and they slide sideways easily also, which some wheels have a hard time doing.
One thing for sure, I’m having fun so far, and I can’t wait to work with the Meranti ply. Even with the challenges and inevitable mistakes I’m gonna make, it’s a learning experience and making mistakes is part of the program!
Thanks for coming along!
t
ParticipantNew to boat building here Fred. What is the advantage of vacuum bagging? Looks like it might reduce sanding?
Where does one look for your setup?
Tim on Whidbey
-
This reply was modified 1 year, 8 months ago by
-
AuthorPosts