Forum Replies Created
-
AuthorPosts
-
December 28, 2024 at 5:56 pm in reply to: Building with Plans Only? – Let’s talk boats on Whidbey Island #52016
Ted Guild
ParticipantHey Tim,
I’m not sure my top speed. I have done 3 nautical miles in sub thirty minutes with motor, sail and tide, so six knots. I almost never put the throttle over 3/4 and the wind+motor combination has been appreciated when either independently wouldn’t have been enough to power through, fighting the tide to get out of a bay for instance.
It is not meant for strong winds but have found a longer (mine about 4’ total and definitely overkill) dagger board nice to have when conditions warrant and you’re stuck making way back, gives you a bit more flexibility before reefing and more stability when gusty overall.
Looking forward to seeing pictures your build Tim. Feel free to reach out by email if you have any questions.
Happy Holidays to OCF staff and community. Your content has been appreciated, extremely informative.
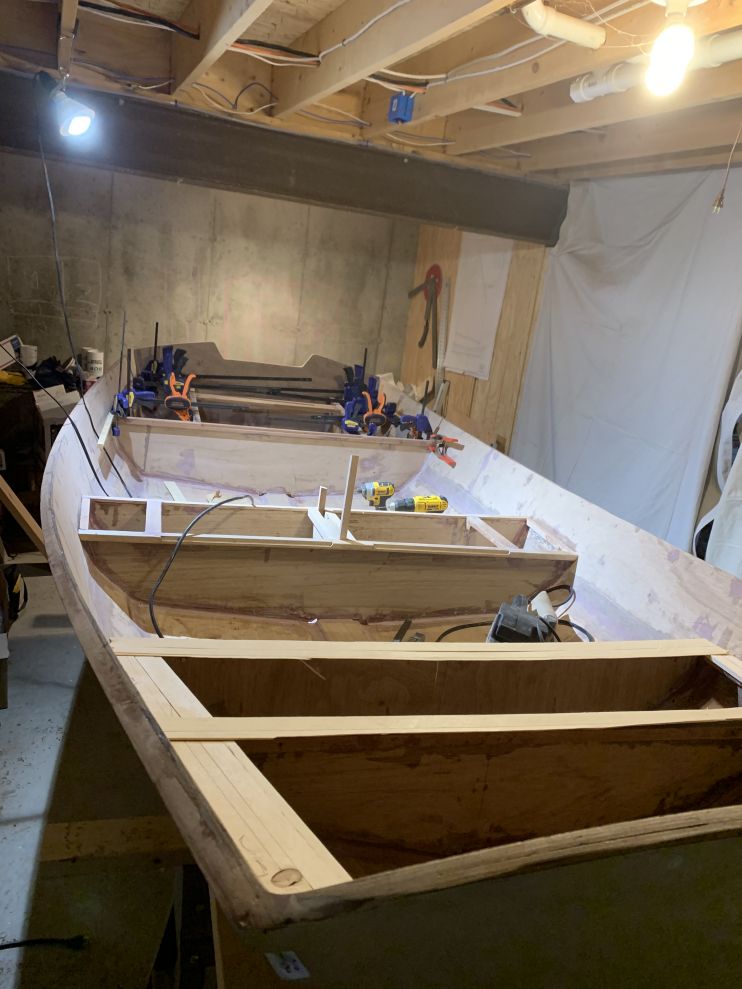
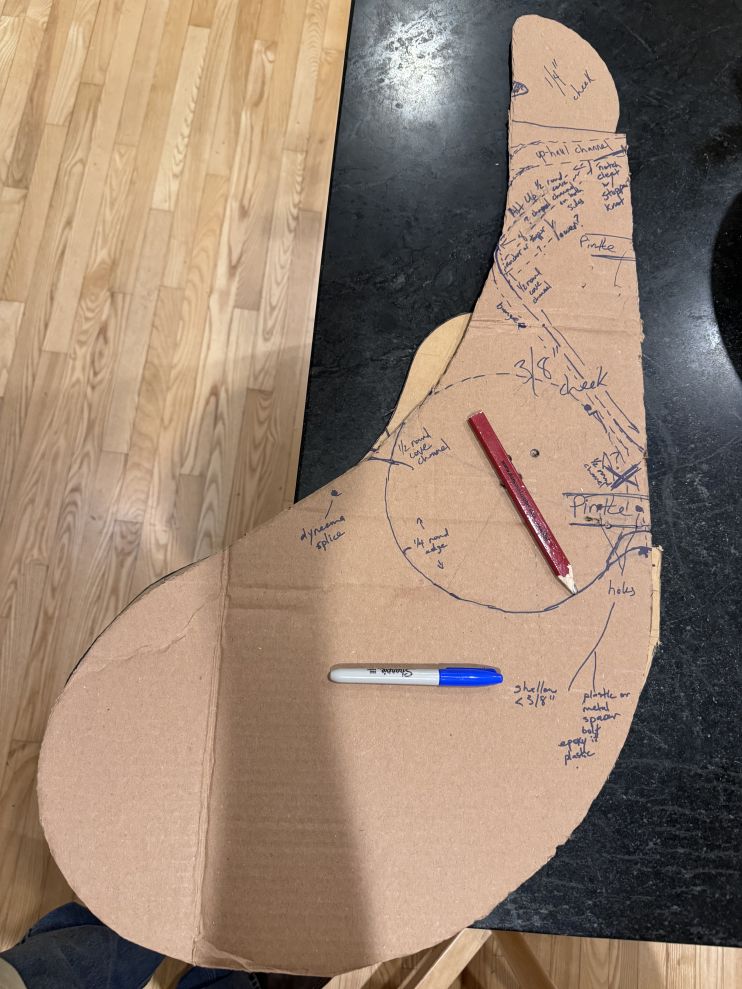
November 26, 2024 at 2:47 pm in reply to: Building with Plans Only? – Let’s talk boats on Whidbey Island #51726ParticipantBen was farther along and we roughed out the spars before I needed to make the interior pieces. For those you need to make your own templates, one or two pieces you may be able to use your mold as a reference.
All the long spruce scraps came in handy making my templates. Measure out the different sides, glue together and then lay on top of plywood and trace.
Here’s one for the bow platform.
I know you’re not there yet but sharing early since I probably won’t renew my OCH membership again this next year. This was a head scratcher moment going from plans instead of kit.
I’m inconsistent in checking email but mine is my first@last name with s.net after last, should you have any questions after the new year.
November 26, 2024 at 2:33 pm in reply to: Building with Plans Only? – Let’s talk boats on Whidbey Island #51719ParticipantSomewhere, either Doug’s intro video on his design, in the notes that came with the plan or maybe Kit in her tutorials said anything more than 5hp is wasted on this hull design. I forget what my Epropulsion one is but that ballpark +-. It can move it around fine and know a larger sail boat that uses the same when not wind powered. You won’t win any races.
November 26, 2024 at 2:27 pm in reply to: Building with Plans Only? – Let’s talk boats on Whidbey Island #51718ParticipantHi Tim,
We cut the planks according to the plans. I measured every plotted point at least three times on the 12×4 (actually 11 something due to scarfing loss). Basically that should get you planks close to the kit, which is just CNC of the plans. Most planks lined up very well with the transom outer edges. I had one probably about 1/8” too long and Ben had one maybe less than an 1/8” too short. Remember what I said about the magic of thickened filler epoxy? The transoms are 3/4” before you plane the angles on the ends, after you probably have a good inch of surface space for the epoxy and screws to attach planks to so don’t fret, but do double or triple check your measurements.
There were times we wished we went with the kit. Definitely a bit more pride and sense of accomplishment going from plans though.
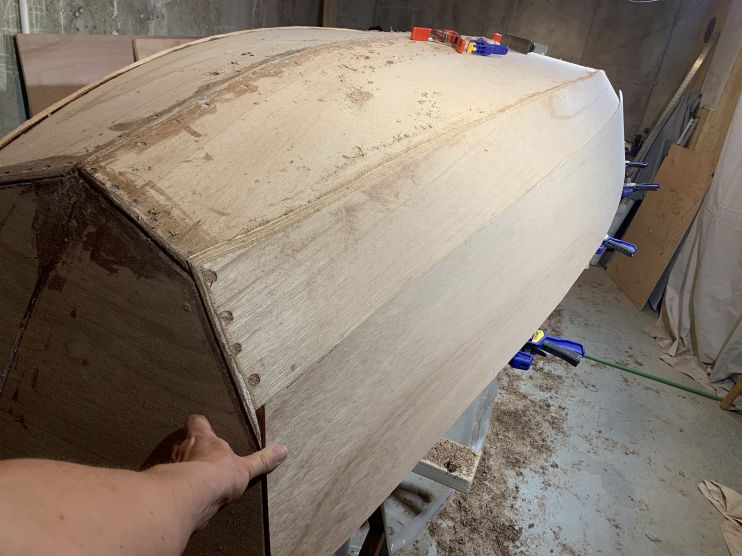
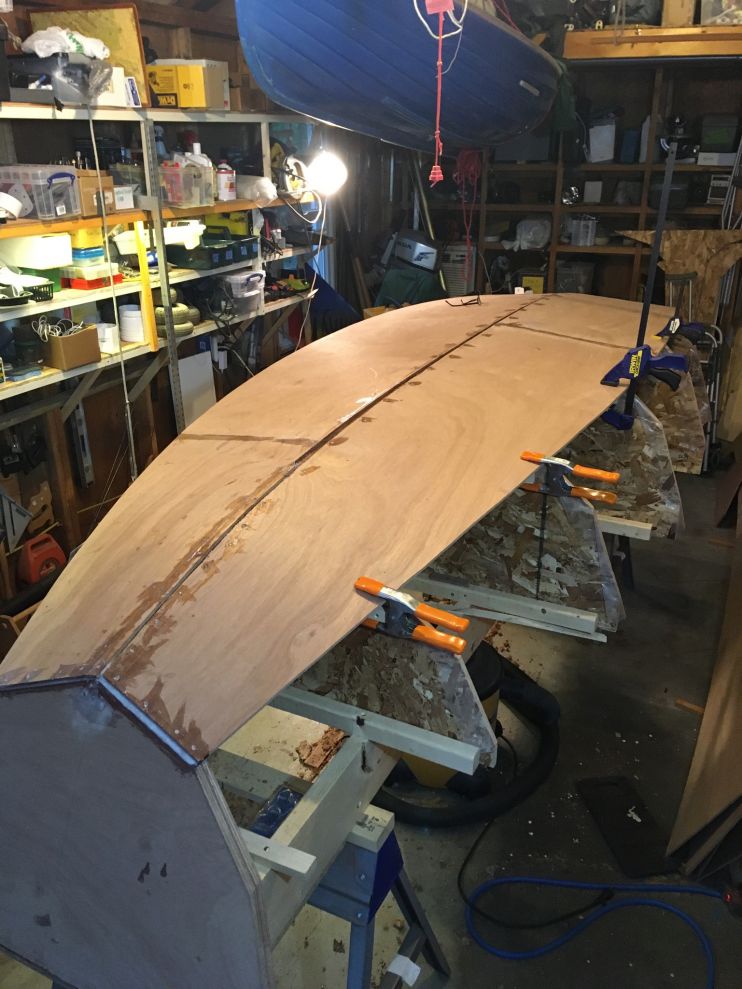
I had my keelsom epoxied before attaching to the frame but your technique should be fine.
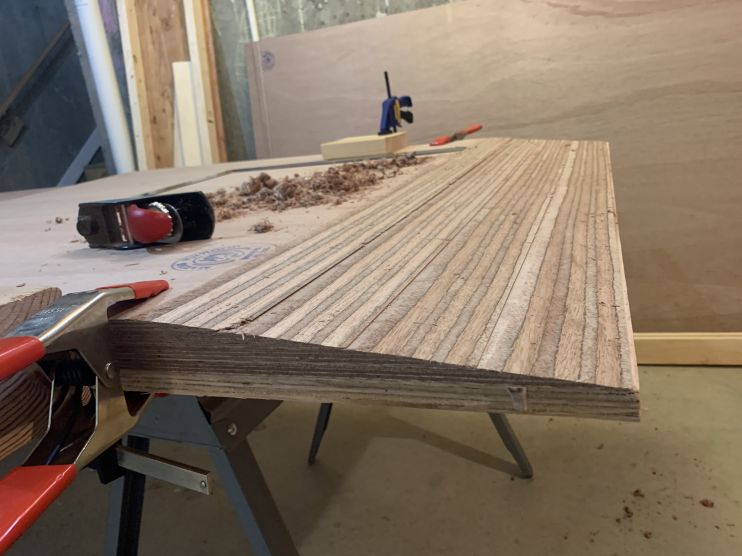
Ben had a scarfing jig for a circular saw he put a finer blade on. Steady hands and a guide helped. We then took the pieces and stacked up, hand planing to try to get angle consistent. We built a temporary frame to hold in place while epoxy cured with ample weights on the seams.
Plastic sheeting helps keep epoxy from adhering to things you don’t want it to.
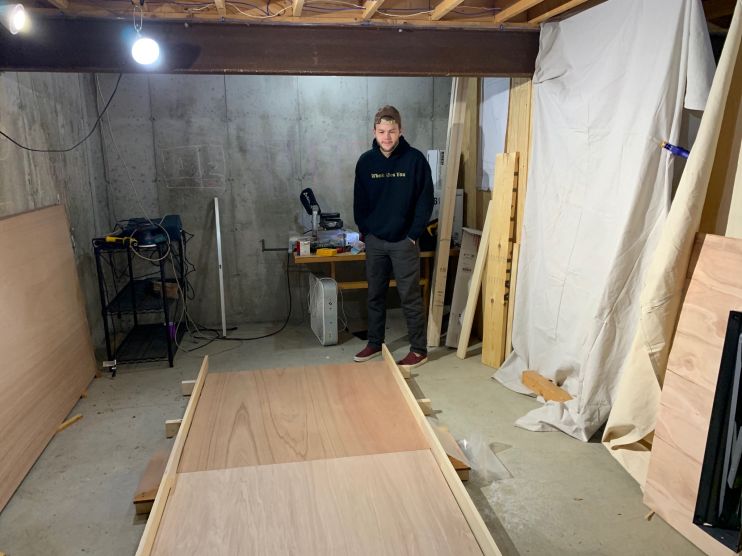
Skeptical millennial not included.
ParticipantThe battery from my Epropulsion motor fits in either of the center bench compartments when under sail.
It certainly would store in the stern compartment but you’ve probably seen the thread about keeping a better line when sailing when there isn’t too much weight rearward. I sit on the floor when sailing and getting the battery to switch back to motoring is fairly easy. It would be more of a scramble to get it out of the bow compartment, may fit but haven’t tried.
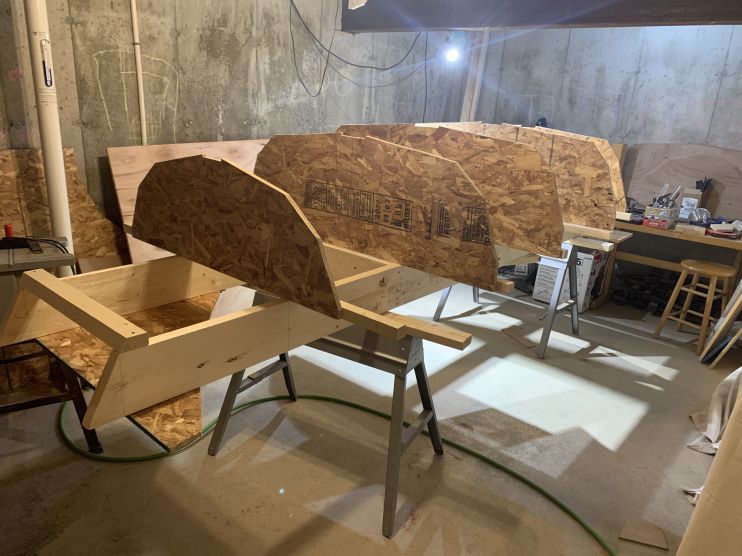
November 22, 2024 at 1:05 pm in reply to: Building with Plans Only? – Let’s talk boats on Whidbey Island #51637ParticipantYes, those were 2×8 or maybe even 10 I had laying around, used as a ramp to load up snow blower, motorcycle or other in to the back of a truck. They’re now attached to some saw horses and serving as a work table.
One of wife’s cousins was a professional boat builder for awhile and we reached out to him with some of our concerns/hesitations. He shared what a former boss told him “you’re not making violins, get to it.”
Thickened filler epoxy is also a miracle worker.
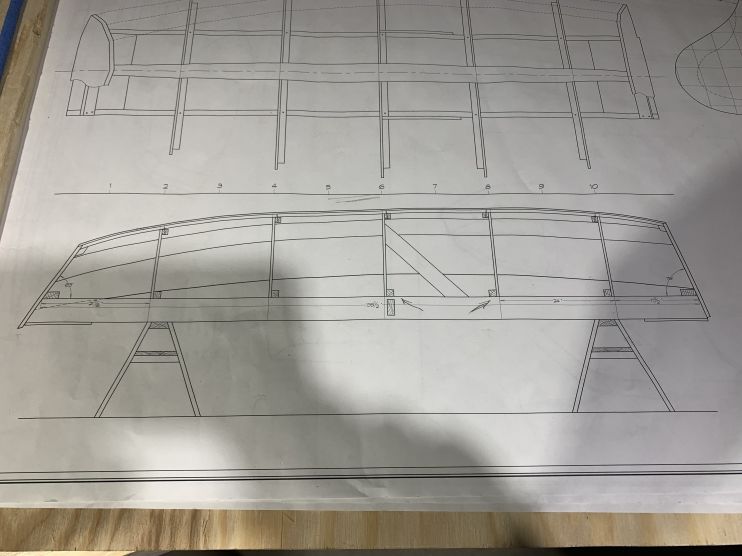
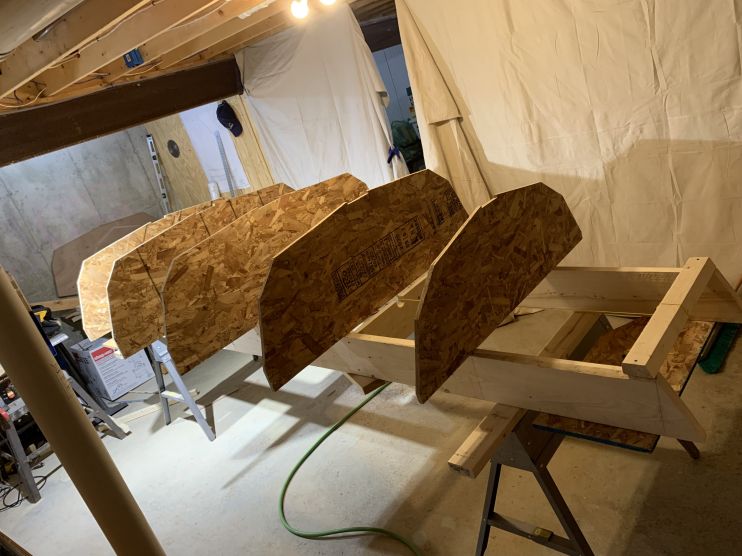
November 21, 2024 at 3:20 pm in reply to: Building with Plans Only? – Let’s talk boats on Whidbey Island #51626ParticipantAs it happens we’re getting together with the other builder and his wife this evening and will point him here too. I have many of his build photos in a shared photo album so will look for his ladder photos. You can tell mine because they were done in a messy basement work space and his in a crowded but organized garage.
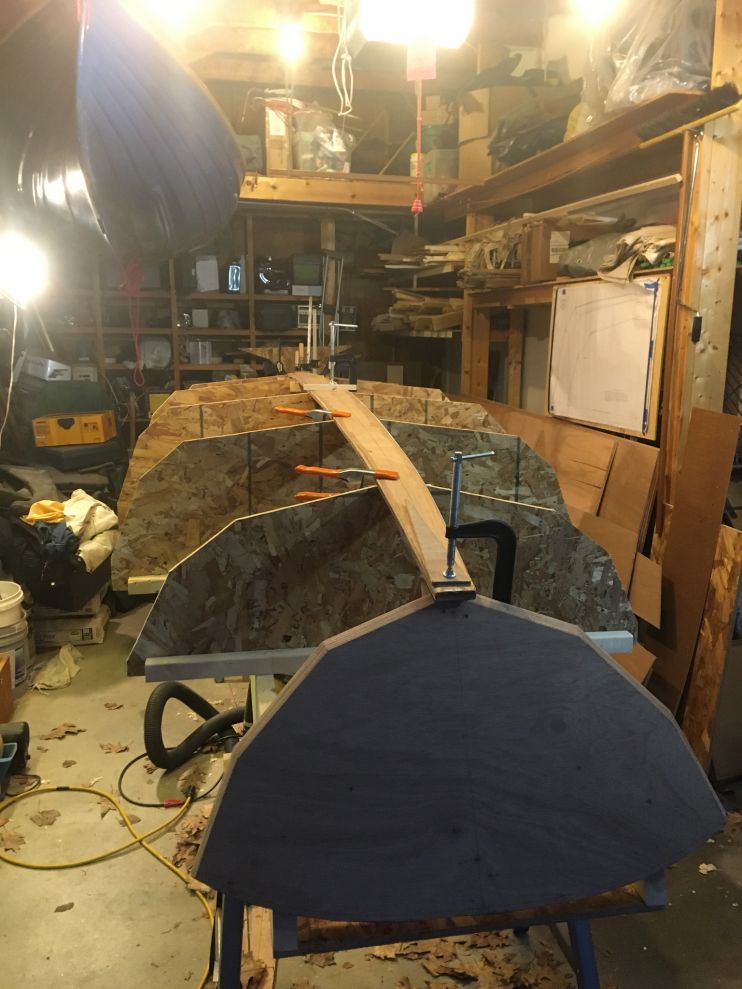
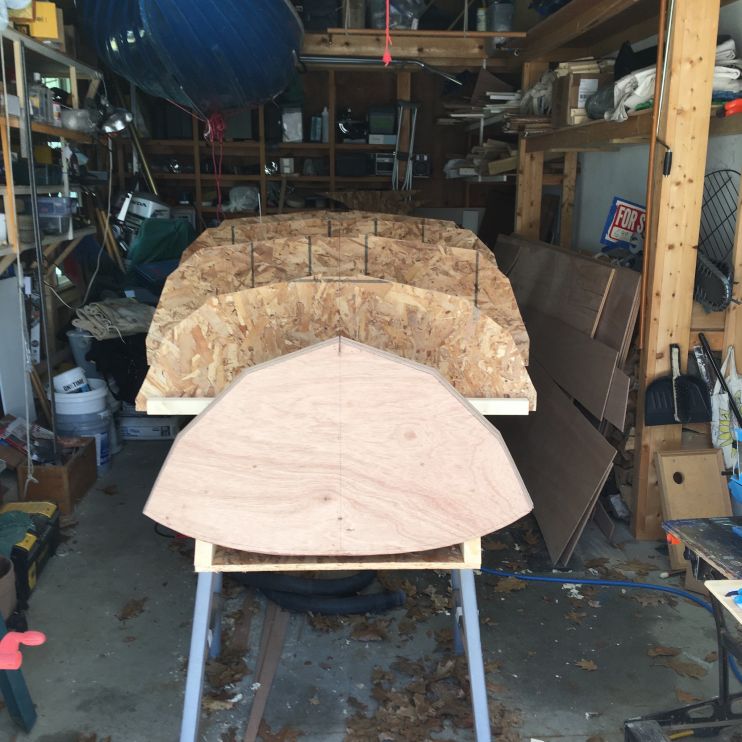
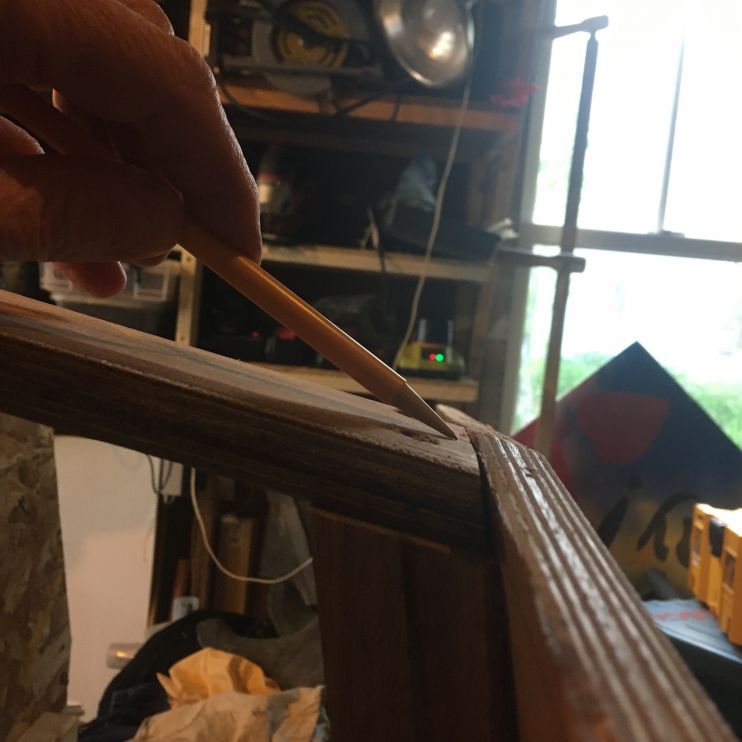

It is important to note how one mold is on different side of marking in the middle, see arrows drawn. The kit builders had the molds provided instead of templates but still had to make their ladders so all their comments and observations should apply. We used carbon paper under the patterns for tracing the mold and transoms. After that we scratched our heads on how to do lofting for planks, came up with technique from watching YouTube videos using nails and a thin, long, straight strip of wood. We measured everything at least twice, often more.
The biggest concern for me was getting the angles correct for the transoms and attaching them.
 Participant
The floatation compartments should be adequate to keep it afloat if flipped. The designer had safety and stability in mind.
The storage compartments with air may trap some air as well in a capsize. Water splashes in but the weep holes lets it flow out into the lower, open cockpit areas when upright. You wouldn’t want a storage compartment that can get flooded, not drain and affect the balance.
I contemplated some sort of latch to avoid kicking lids up when moving around but it hasn’t been an issue. I tread carefully when standing. I do use some gaffer’s tape to hold them closed when I flip and store it for the winter.
November 21, 2024 at 7:54 am in reply to: Building with Plans Only? – Let’s talk boats on Whidbey Island #51622ParticipantWe did our builds from plans and use to say those following the videos with kits: “they’re building boats, we’re building character.”
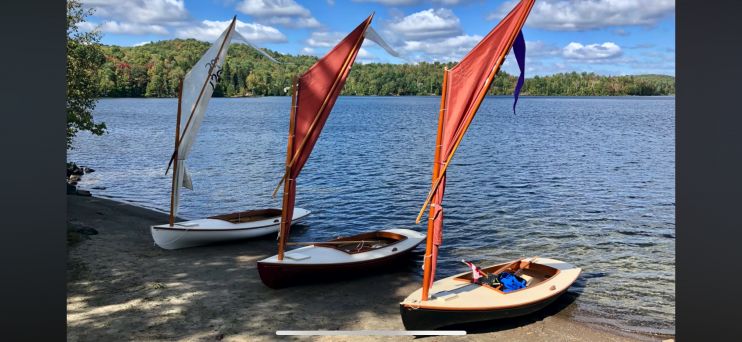
They were both built in Maine but one resides in Seattle. My friend gifted his to a couple of his nephews out there. They do some sailing in addition to rowing and motoring in the sound, lakes and have even sailed it as a drift boat fishing some river.
Definitely have photos of the process and vague recollections if there are specific things you have questions about, might be able to help.
ParticipantDo note in the OCH videos that the stern transom was lowered some to be more suitable for a motor. I did the same.
ParticipantLot’s of epoxy, sealing the wood surfaces, the seams and polyurethane paint same as keeping water coming up through the hull. I fiberglass taped all the seams in my bulkheads.
I’ve never submerged to test if they’re truly water tight but at most there may be some small leaks and air should remain trapped.
I know of one Oonagh that was purposely flipped and understand it was difficult to do, the floatation compartments worked as expected and it was fairly easy to right.
November 20, 2024 at 12:57 pm in reply to: Building with Plans Only? – Let’s talk boats on Whidbey Island #51597ParticipantTim,
Reconsider the mast etc. It’s my preferred of the three means to power it.
ParticipantI had to leave the traveler longer than I would have preferred but it works. Often I remove the battery from the motor when under sail which helps and allows me to put a bit of weight forward.
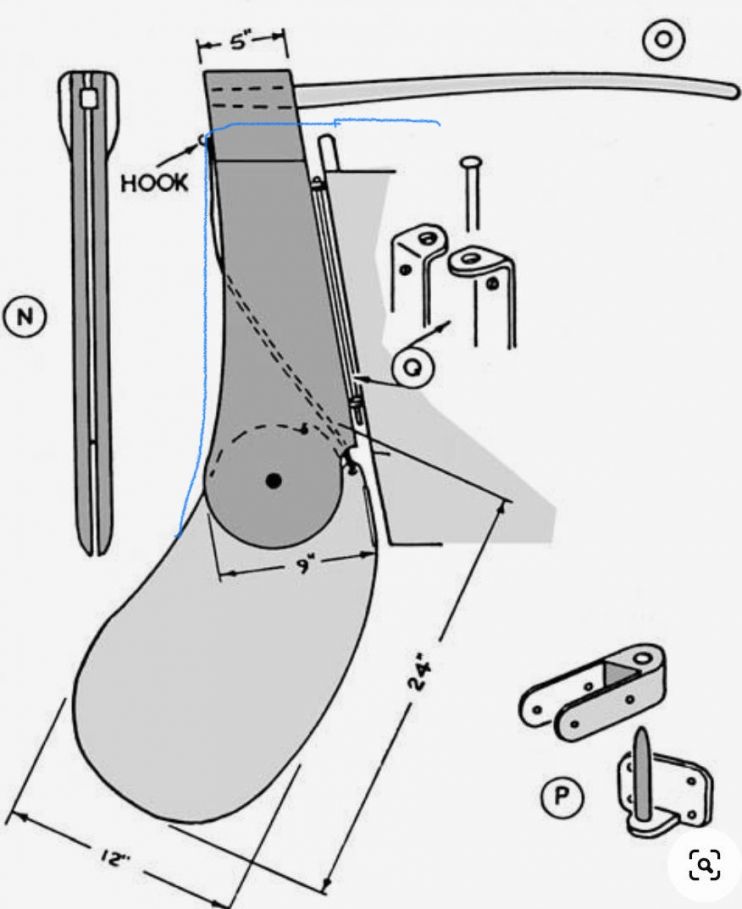
ParticipantHow I’ll probably rig getting the sail out of the way for rowing.
 Participant
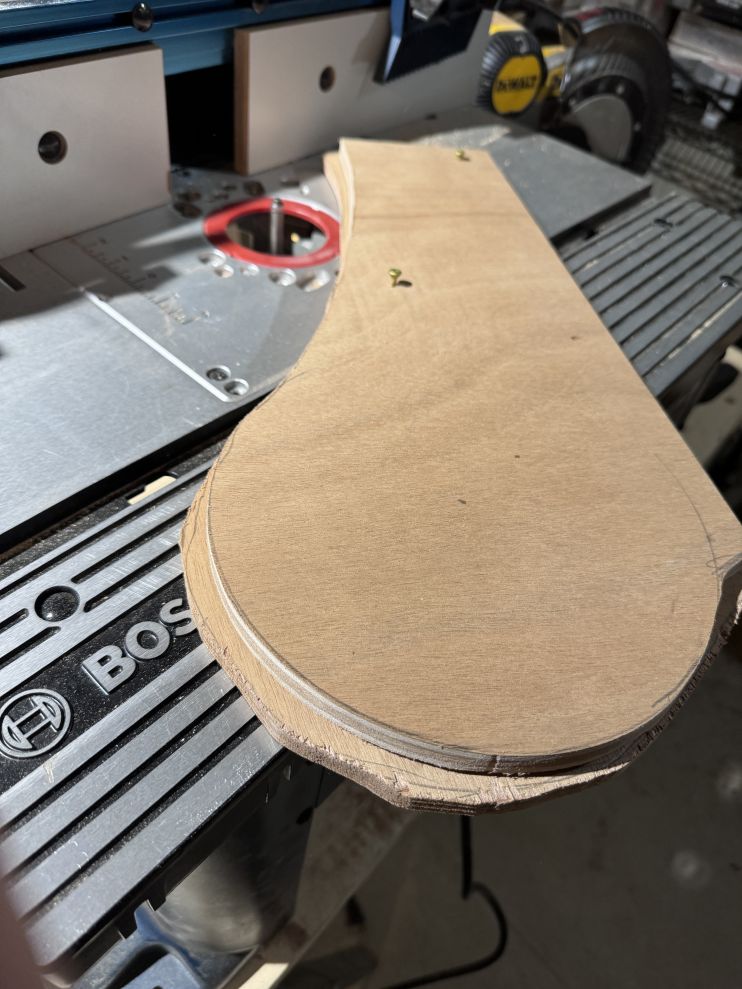
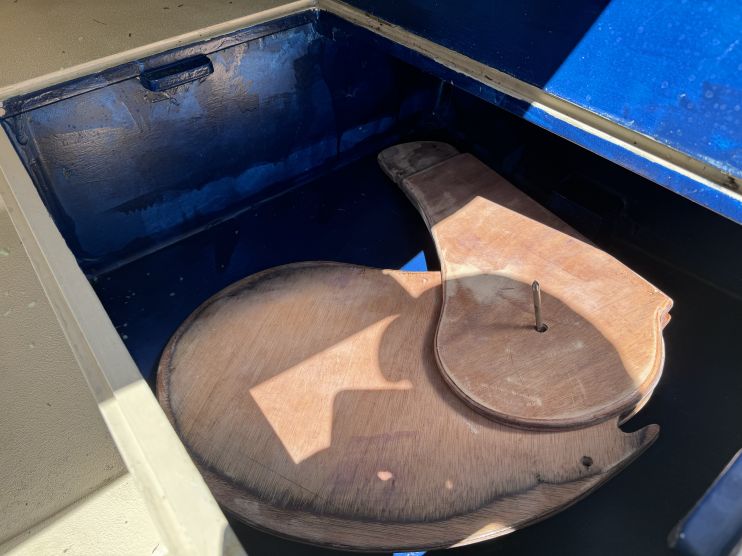
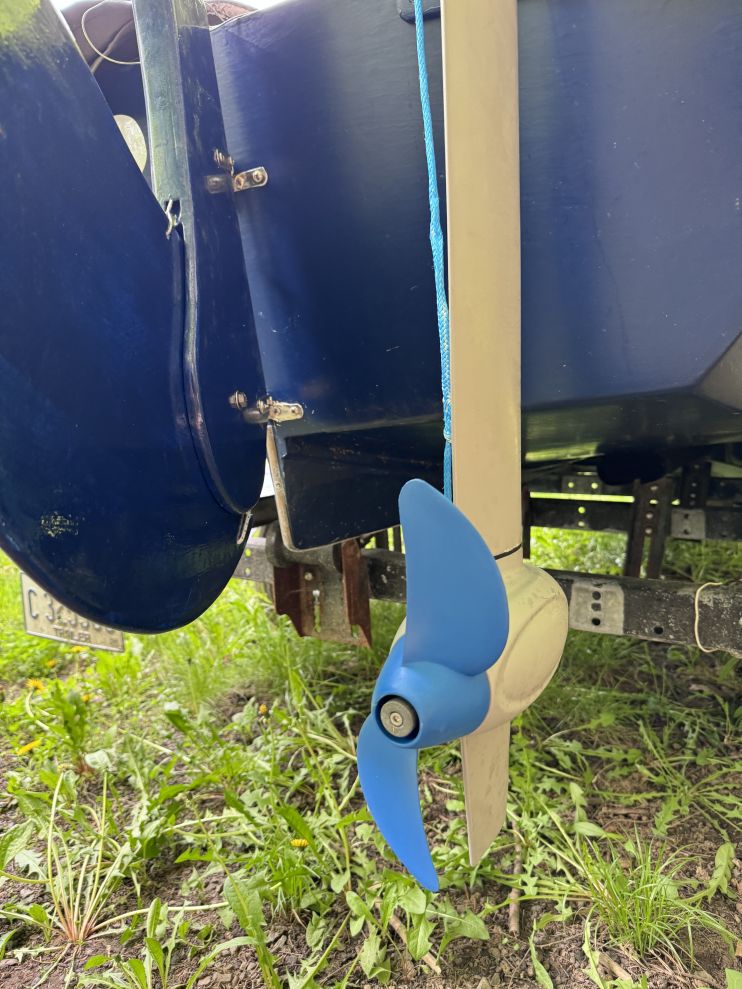 As you can see, it can stow in the stern compartment unlike the original rudder.
A few inches higher on the pivot point would have been better. As mentioned the boat was already flipped and covered so couldn’t really try a cardboard mockup with engine attached. I may make another this winter.
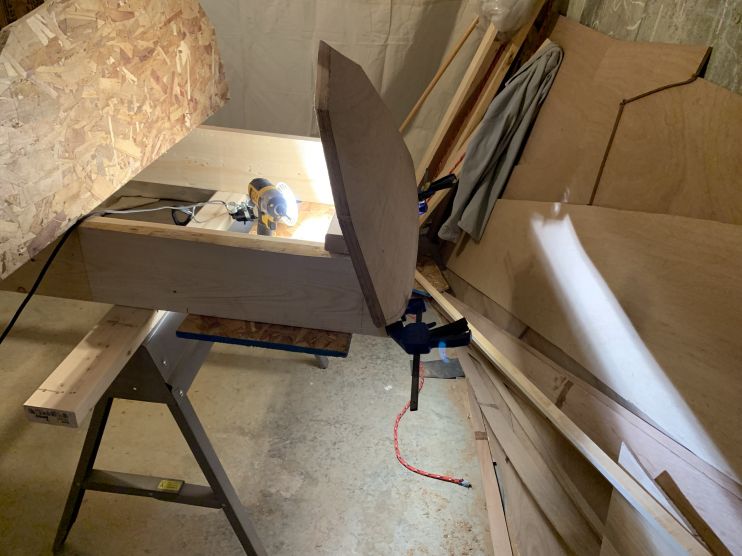
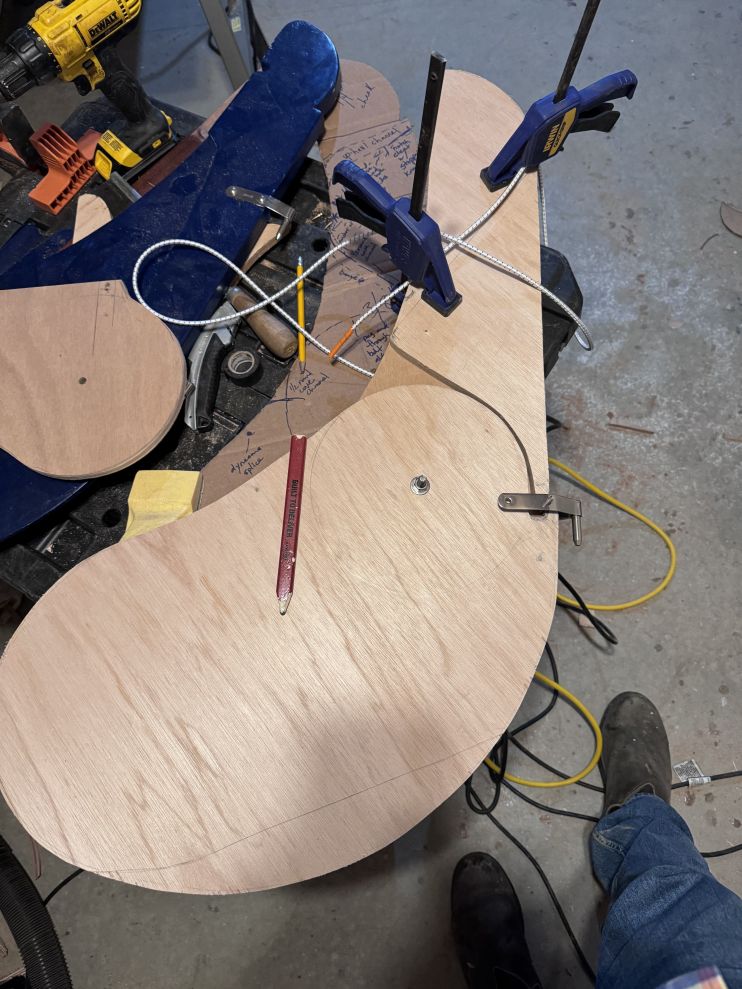
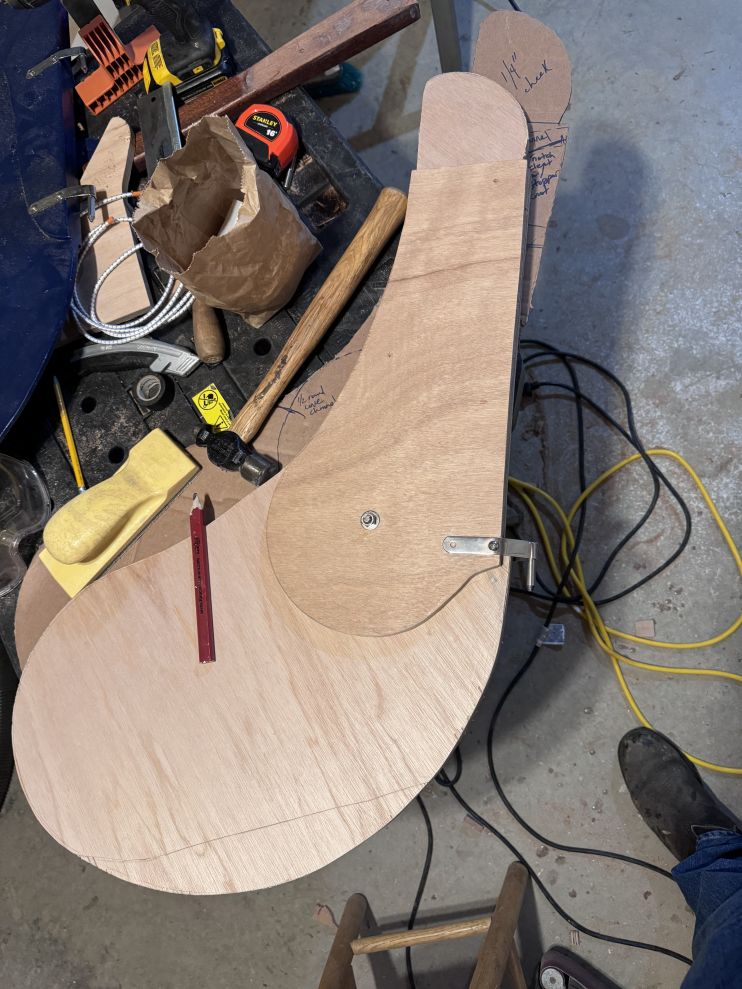
Screwing together mirror pieces like the cheeks on the rudder is a great aid in getting them the same on router.
ParticipantHere are a few pictures of the kick up rudder.
 Participant
Hi Tim,
I’m seldom on here as are others who have completed their builds but received an email notice of your response to an old post of mine.
My friend Ben and I did parallel builds from plans not kit as you’re considering. It was well beyond my skill set and limited power tools’ capability. I’ll do a launch post with pictures and modifications.
You can find videos on YouTube for things not covered by OCH kit based videos for things like scarfing and lofting. I found using a flush trim bit on router helpful in making matching pieces. Jigsaw, plane and sand a plank or transom as it should be and then use it as a template with router and rough cut mirror part.
We had a hard time finding marine grade plywood in something other than okoume as a retired boat builder warned us off that but seems the issue was more the glue laminate. We got meranti ply, used meranti decking elsewhere except for the mast and spars. For those we epoxied spruce so grains would oppose and not warp. We wanted Douglas fir but didn’t find a lumber yard that carried it until later.
As to your question, it is reasonable to switch between sailing and motoring by just pulling the rudder up and off the pintles. Putting the rudder on after lifting the motor a bit more of a challenge because the rudder is buoyant and you’re bobbing around.
I made a kick up rudder last winter so I can leave it attached while motoring. The boat was already flipped so wasn’t able to prototype properly and based it off propeller scuff marks on the original rudder. I should have made the pivot point a bit higher. It stays out of the way unless I go into reverse and rudder gets pushed closer to the transom.
I need to figure out a better way to rig things so I can quickly get the boom, yard and sail out of the way to switch to rowing.
ParticipantHey Fred,
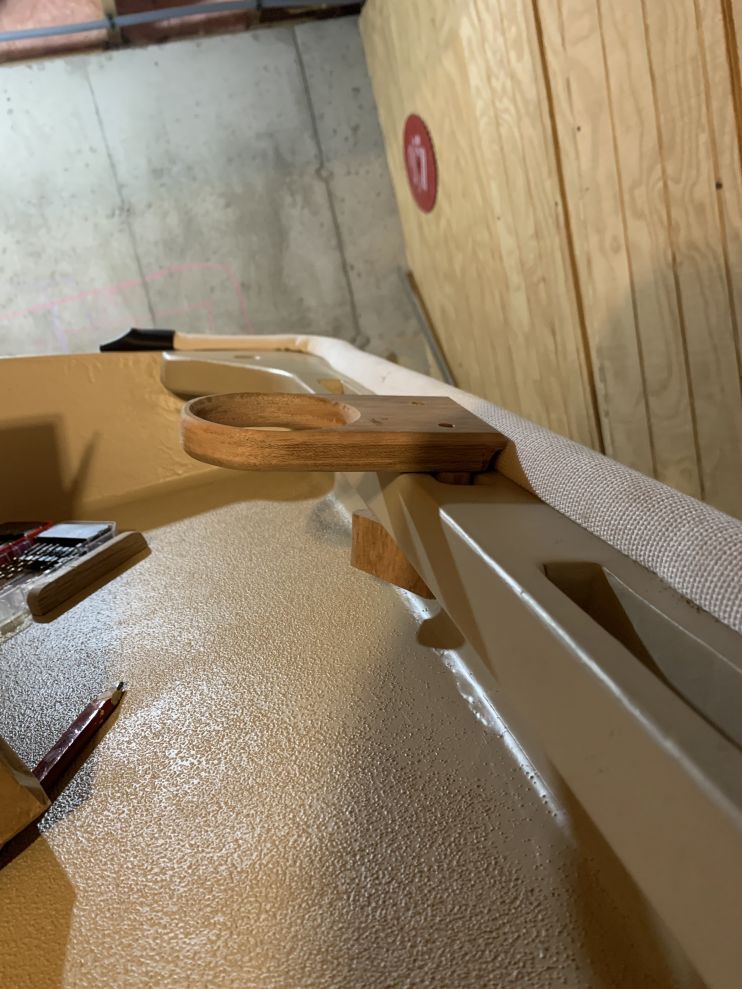
That looks sharp. I added texture to paint on floors and platforms on mine, came out fairly well and a movable cup holder. I really like the organizer in the stern compartment and might do something like that.
 Participant
As I thought, the motor might be an issue for the traveler. Anyone using an outboard and come up with a solution?
I’m thinking my only option to be able to sail with motor mounted would be to go boomless, not have a traveler and move the block each time I come around like Roger Barnes does in his videos.
Open to suggestions
Participant
-
AuthorPosts